Operation
Archway - 2nd SAS - Len Arthur memories & SAS Operation Archway report - 20 March -
10 May 1945
Map of the operation and day by day progress 20 March - 10 May 1945 as detailed in the SAS operational report.
Annotated map of involvement in Operation Hardy and Wallace in France August - October 1944: https://maps.app.goo.gl/A1trwDcr6tR1FV5d9
Please open this map and consult it as you read this report as it includes all the points of reference mentioned in the text. https://www.google.com/maps/d/u/0/edit?mid=1fR1SrUzvm4prwjGKv_3rhlX4Puz6VGQp&usp=sharing
 |
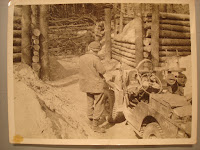
| Len Arthur beside jeep most probably May 1945 |
Written and collated by Len Arthur (Jnr) - sourced from Len Arthur’s recollections and a copy of the SAS Operation Archway report provided by the SAS Association archive department.
Archway
was the next SAS operation that Len was involved in which started in March
1945. Their section of the SAS crossed the North Sea to Antwerp and then drove
across Belgium and into Germany aiming for Wesel on the Rhine. Archway was the
overall name given to the allied operation into Germany. Operation Plunder was
the name given to the specific operation to secure a bridgehead across the
Rhine around Wesel and Operation Varsity the name given to the allied paratroop
drop. The First and Second SAS were involved in Archway and were known
collectively as the ‘Frankforce’ following the name of the commander Lt Col
B.M.F. Franks. Len was a member of the Second SAS squadron consisting of two
troops each with three sections and each section having three jeeps - 18 jeeps
in the squadron backed with transport jeeps and heavier vehicles.

Frankforce of both squadrons arrived at Ostend on 20 March 1945 (P1 on map). The following day they drove to Bree in Belgium (P2 on map) and then on 22 March driving to an invasion concentration area West of Issum in Germany (P3 on map). They arrived at 23.30 for a short rest before setting out to cross the Rhine.

Under the command of the 18th US Corps Frankforce
crossed the Rhine at Wesel on March 25th (P4 on map) as part of the
allied airborne Operation Varsity which was in turn part of the overall
Operation Plunder which had secured a bridgehead overnight on the eastern side
of the river. The SAS and their jeeps crossed over the Rhine in amphibious
tracked vehicles called Buffalos – see Len’s photos - and then marshalled in a
wood just outside Wesel for the night
(P5 on map) before starting heading east ahead of the main army groups.


On 26 March the 2nd SAS squadron was in action (P6 on the map) and had a ‘successful day’ with the 6th Airborne in a short range recce as the 6th’s unit had yet to cross the Rhine. The 6th were advancing eastwards from Hamminkelm and the squadron was required to protect the open flank to the north. Several Germans were killed and 42 PW taken. Three jeeps were slightly damaged but the personnel of the squadron suffered no casualties’.
Frankforce of 1st and 2nd SAS was divided into the two
squadrons on 27 March. !st SAS took over the commitment with the 6th Airborne
and 2nd was allocated to the 6th Indian Guards Armoured Brigade which was under
the command of the 18th US Corps whose task it was to advance down the road
from Wesel to Munster and seize crossings over the Dortmund Ems Canal. (P8 on
the map).
As an example of the type of action they were taking
part in this is an account of the 1st SAS action that day (P7 on the map) near
Erle just North of Schermbeck.
“Major Fraser’s 1st SAS Troop passed up through the
forward troops and met a battalion of Canadian Paratroops who reported having
attempted to take a wood. They had been driven back by heavy Spandau, Bazooka,
and infantry fire, with the loss of eight men. The Canadians were preparing to
re-engage the enemy with mortar and artillery fire before attacking again.
Major Fraser decided to attempt to take the enemy unawares by attacking from
some dead ground on the left flank. The troop approached unseen to within 30
yards of the enemy position which a well camouflaged machine-gun opened up at
Major Fraser’s jeep which ran into a ditch. Major Fraser was wounded in the
hand. The troop fanned out in front of the wood and Lieutenant Riley’s section
destroyed the infantry gun together with its crew. Lieutenant Jenson’s section
on the left engaged Bazooka and Spandau positions and silenced them one by one.
Lieutenant McLellan engaged the enemy in a group of houses on the right flank
and Sergeant White’s jeep was detailed to tow out Major Fraser’s jeep under
covering fire. The troop then dismounted and, covered by the jeeps, cleared the
wood and eliminated enemy sniper positions. 10 Germans were killed and 32
prisoners taken in this action.”
2nd SAS joined the 6th Indian Guards near Schenbeck (P8
on the map) on 29 March. The armour was confined to the main roads so the jeeps
did useful work on the side roads covering the left flank during the advance
through Dulman (P9 on the map) to Munster. A lesson that was learned from this
period was the need for continued mobility and the avoidance of close country.
To the West of Dulmen (P9 on the map) a jeep became bogged down during an
engagement. Mortar fire was directed onto the enemy position. One jeep was
already on fire and as the other was irretrievably stuck it also was brewed up.
Sergeant Vickers, who was wounded, was brought back under cover of a smoke
screen. Three jeeps approached three tanks only to realise that they were enemy
when fire was opened. One jeep was crushed under a tank and two captured by the
enemy as they had to be abandoned under heavy fire. Two men were missing but
returned within four days. Another section penetrated 10 miles but withdrew
under heavy fire with prisoners.
Still working the north flank of the armour 2nd SAS
joined the 8th Corps after Munster was taken on 1 April (P11 on the map).
Movement forward into Germany was beginning to go faster and the Frankforce HQ
moved to Grevon 2nd April (P12 on the map), Eistrup near Osnabruck, 5 April
(P13 on the map), then Melle on 6 April (P14 on the map), 8 April SW of Loccum
(P15 on the map).
Len mentioned this period in this way. Some days they moved quite fast across Germany, passing through small towns with a considerable amount of noise and ensuring their surrender. At the time he had mentioned using church spires, but I’m not clear who would have been doing this. At other times they were involved in clearing tank traps which one of the photos provides an example. Securing river crossings was another objective. Len mentions moving along the bank of a major river which may have been the Ems or the Weser and could see German troops moving from their positions as they appeared.

There was concern among the allies that the Germany
army would resort to guerrilla warfare and sabotage as their retreat
progressed. They were aware of the plan to train units known as ‘Werwolf’
which at the time was considered a real possibility. Consequently, the 2nd SAS
Squadron was placed by the 8th Corps at the disposal of the Military Government
and entered Nienburg 9 April with the leading troops and captured several
political prisoners, including the Ortsgruppenführer (P16 on the map) [Nazi
party poltiical officer] . By 11 April Frankforce HQ moved just south of
Esperke (P17 on the map).
This work for the Military Government now seemed to be
the main work of the 2nd SAS. On the 12 April (Point 18 on the map) the report
states:
“The 2nd SAS Squadron entered Celle at 05.00 hrs ahead
of 15 (S) Div [15 (S) Div 15th Scottish Infantry] with the object of releasing
PW and seizing leading party and SS officials. There was no opposition and five
members of the KRIPO [KRIPO was the criminal investigation branch of the Nazi
Reich criminal police] as well as certain prominent Nazis were detained pending
the arrival of the Corps I.B. [Infantry Brigade] authorities.”

The report continues “At 09.00 hrs, No 1 Troop crossed
the river Aller by the main bridge which had been partially destroyed and was
only practicable for jeeps.”

Len mentioned this crossing and was in the lead jeep.
He explained, it was a girder bridge which had been blown, but a piece of the
walkway remained. Len’s jeep, driven by Jo Rushbrook edged across this walkway,
only to find that unfortunately the walkway had in fact been blown apart.
However, Jo thought it would be possible to get across and jump the gap at full
speed, so they did! Len said they were greatly rewarded at the other side as
after securing the access to the bridge they discovered a wine cellar which was
put to good use. They used some tape to say it was under Allied control, loaded
up the jeep and shared the spoils around when the Royal Engineers turned up to
put a temporary and more stable crossing in place. Len said that there was a
Sergeant who stood on the end of the bridge as it was eased across the river to
ensure that it was lowered into the chalked pre-set marks using hand signals.
He had had quite a bit of the brandy and the hand signals were somewhat erratic
leading the bridge to waver around but he somehow managed to lower it into the
right spot!
Len mentioned that once across the bridge they had to
secure access and this appears to be referred to in the report.
“The German gas school on the East bank of the river
was taken over and a recce was carried out along the road Boye - Winsen. There
was a short engagement with SS troops north of Celle during the evening” Some
securing! (Point19 on the map)

The report continues in relation to the evening of the
13 April “At night enemy tanks and half-trucks which had been cut off were
reported in the area of south of Altencelle”. This was about three miles to the
south east of Celle town centre. Celle was close to the operational dividing lines
between the British and American forces and the report goes on to mention that
“The Americans had contacted them to the south the night before but the 8th
Corps [British] were unaware of this”. Close shaves remained constantly in the
background, despite the fun with the Porche.
On the 14 April the search continued for German AFS
[artillery units?] which had been reported the previous day (Points 23 and 24
on the map) before moving north. The report states “The villages of Bocklescamp
and Flarkenhorst were reported clear but in the river eight-tracks and an
American armoured car were found abandoned. The latter, which had a 37mm gun,
was taken into use and provided much needed extra hitting power”. Almost as
good as finding the Porsch, you can imagine the scene.
Between the 14/19 April the 2nd SAS worked with the
15th (S) Div Recce unit “covering the advance area from Uelzen to just short of
the Elbe at Neetze” (Points 21 and 22 on the map). The report continues “The
Squadron was almost ideally employed over this period, and of very definite
assistance to the slower moving Recce Unit which, on the other hand, provided
the heavier fire power and armour when the jeeps encountered more than they
could engage”.
On the 15 April the Force HQ moved to Schanhorst (Point
25 on the map). The Force of course was the combined Frank force of the 1st and
2nd SAS. They were carefully moving forward fanning out across the area from
the HQ. This pattern of reconnaissance can be seen from the work of the 2nd SAS
on the 15 and 16 April (Points 26 - 29 on the map). It was north-east of
Bargefeld (Point 29 on the map) that “... a troop on recce came under fire from
enemy LMGs sited near Gerdau (Point 30 on the map). Fire was returned, but as
Gerdau was held by a considerable force of enemy with 88mm guns the troop
withdrew to Bahnsen (Point 26 on the map) where the whole squadron and Force HQ
spent the night.”
It was also on 15 April that during one of these types
of reconnaissance that a troop from 1st SAS found the Bergen-Belsen
concentration camp (Point 31 on the map) working with the Inns of Court
Regiment. A reference to this event does not appear in the Operational report
possibly as a result of focusing very specifically on military issues. It does
not take much imagination to realise how difficult it must have been to
continue with that focus when confronted with the consequences of
genocide. Len said that at one stage in
this period in Germany they were near a concentration camp and could see
through their field glasses what was going on but had to press on with their
work. This may have been on the early reconnaissance (Point 19 on the
map).
“On the 17 April, 2nd SAS made contact with the 11th
Armoured Division at Eimke. Gardau and Gressisuestedt (Point 30 on the map)
were reported clear and Barnsen (Point 33 on the map) was cleared during the
afternoon with a group of 15(S) Division Infantry on Churchill tanks. A large
number of the enemy were captured. Two jeeps were bogged down near the village
and were pulled out by L.A.D. Shermans.”
On the 18 April the 2nd SAS were switched to the
north-east of Uelzen (Point 34 on the map). “Many PW were taken and a few enemy
killed. Lieut Laws was wounded while making a recce on a captured motor-cycle.”
Another example of if it can be used - get it going.

On the 19 April Force HQ moved to Bruchterf (Point 35 on the map). The 2nd SAS with 15 (S) Recce led the advance from Bevensen (Point 36 on the Map) to the Elbe on two axes to Breetz (Point 37 on the map) and Neetz (Point 22 on the map). Contact was made with the 11th Armoured Division at Neetze and a recce was made eastward to Bleckede (Point 39 on the map) were it was found that the Germans were maintaining a bridgehead, so the SAS returned with 15 (S) recce to Neetze for the night. It was noted in the operational report that the country around Breetz was very difficult owing to the density of the woods. On the same day to the west 1st SAS entered Luneberg (Point 40 on the map) to seize AA leaders. The troop was kept busy for three days searching houses and cellars and had considerable success.

It was 10 days later that sufficient troops and
equipment had been moved into place to make crossing the Elbe a success - it
was known as Operation Enterprise. There might also have been
some final political and military negotiations taking place about where the
Russion zone would end in the West as the Elbe was the agreed line in general
but not necessarily the Northern ports near the mouth of the river. The decision
to cross the Elbe on 29 April appears to have had a number of factors involved.
Major Hibbert’s 2nd SAS Squadron crossed the Elbe on 29
April at 15.00 hours. It is not clear from the report where the crossing
actually took place but from later references it was near Schnakenbeck (Point
43 on the map). The report states that after the crossing Capt Mackie’s troop
which had reverted to its original squadron under Major Hibbert, was detailed
to report if the area to Gueltzow was clear (Point 42 on the map). It also appears from this section that 2nd
SAS had reorganised the command structure so it is now not clear where Len’s
troop was now placed so reference will be made to all SAS actions. On crossing
the troop came under enemy shell fire at Schnakenbeck which was being directed
at the bridgehead but no casualties were incurred. Other troops were sent to
Juluisberg (Point 43 on the map) and Krukow (Point 44 on the map). Both these
sections entered Guelzow (42) simultaneously without opposition.
A troop which was sent toward Wangleau (Point 46 on the
map) encountered a light flak gun just outside Guelzow but the crew ran away
when the jeep opened fire. Immediately to right there were three 105mm guns
which were brought under mortar and Vickers fire; the enemy retreated and the
guns were destroyed. The report continues with a more tragic report saying that
Captn Morris’s troop was held up short of Leutow by SS troops (Point 47 on the
map) and in the resulting engagement Capt Morris was killed. It seems that this
may have been an encounter toward the end of the war that Len described as it
is the closest to his account in terms of the content of the operation report
and the geography of the area. Approaching a bridge they – a stick of three or
four jeeps, were fired upon by an artillery piece placed on a hill overlooking
the river. They took cover and one of the jeeps went up a wooded track leading
to where the firing had come from to make a challenge. The jeep took a direct
hit and all the SAS in the jeep were killed. The others then returned the fire
using their mortars and soon started to get an accurate range. Fire was not
returned and when they reached the position the crew had either been killed or
had moved off. When they were in the position they could see that they must
have trained the gun on the only gap in the trees where the track and the jeep
could be seen.
On 30 April Frank Force HQ crossed the Elbe with Major
Power’s Squadron and moved first to Juliusberg (45) and then to Kollow (Point
48 on the map). Major Druce’s troop took over from Capt Mackie and continued to
recce to Schwarzenbeck (Point 49 on the map) while Capt Mackie’s troop recced
Hamwarde (Point 50 on the map) and Worth (Point 51 on the map). As a sign of
how fluid the situation was, 2nd SAS was experiencing some rearguard resistance
whilst within hours possible surrender situations could develop such as what
happened later in the day. In Schwarzenbeck (49) two German officers were
captured and one of them said he had come to negotiate the surrender of an SS
battalion. Major Barkworth I.O. 2nd SAS, returned with the German officer to
the SS Bn HQ at Wangelau (Point 52 on the map) where the battalion was in a
state of indecision. The battalion commander would not consider surrendering and
after some discussion, Major Barkworth visited the German Div HQ at Poetrau
(Point 53 on the map) but was unable to obtain a clear order for the surrender
of the SS Bn. However following Major Barkworth’s return to the SAS positions,
Wangelau (52) was attacked by a Marine Commando unit backed by some artillery
and the SS Commander surrendered with 8 officers and 56 other ranks. This was
the same day as Hitler had committed suicide so knowledge of the collapse of
the Nazi leadership was probably beginning to seep down to the troops.
With a bridgehead on the Eastern bank of the Elbe
secured and crossings in place on 1 May 11th Armoured Division crossed the Elbe
(43) on the night 30 April/1 May and moved North. 2nd SAS continued to cover
the flank and move closer to Hamburg with Capt McGregor and Lieut Robertson’s
troops recced the area West of Schwarzenbeck (49) on the fringes of the
Sachsenwald (Point 54 on the map). Then on the 2 May the recce continued West
to Bargteheide (Point 55 on the map).
On 3 May Frank Force HQ moved to Luttjensee (Point 56
on the map) and then on to Gross Handsdorf (Point 57 on the map) Major Poat’s
1st SAS Squadron reached Lubeck and moved on to Kiel with 30th Assault Unit
(Point 59 on the map).
Although the German forces capitulated on 4 May it was
not until 7 May that Admiral Doenitz agreed to an unconditional surrender at
Rheims in France and the final document was signed in Berlin on 8 May. Despite
this, anger remained, and Len and his colleagues were involved in taking prisoners
and disarming German troops in the area around Hamburg. On one occasion they
were doing this in an orderly way through the sergeants with the German troops
lined up being watched from the jeeps with guns at the ready. From one side a
machine gun fired and everyone hit the ground and Len’s jeep swung their
Vickers gun around and fired a warning burst in the direction of the fire. Two
young boys of the Hitler youth appeared and surrendered. The German officers
expected them to be executed on the spot, but Len’s crew told the boys to take
their trousers down and indicated to the German sergeant to use a cane instead.
The operation report ends with one simple sentence
‘Frankforce embarked for the U.K. on the 10 May’.
On the ground with the 2nd SAS there was still a considerable amount going on behind this one sentence. After the surrender the SAS were given instructions to return to Wivenhoe. From what Len has said about this journey back to Antwerp they seemed to have enjoyed the drive. Len experienced one last incident when the jeep hit a rock embedded in the ground and as he was stretched out asleep on the kit in the back he was shot into the air and over a hedge. As you can imagine the others went looking for him wondering where he had gone and as luck would again have it he was fine except for some bruises and appeared over the hedge asking if they were looking for him! The jeep was out of action with the steering rods being bent. They managed to get to a local French garage but the Germans had taken all his tools. However, Len saw a fixed vice and they managed to straighten the rods using this.

Arriving back in Antwerp they had acquired along route some bales of silk. They thought they would have some time to trade before they had to leave but were told that they were to go early the following morning. This meant a quick tour around Antwerp in the early hours to find a merchant, it appears they were successful. Len managed to return with a number of bits and pieces. It appears that if one of the SAS were wounded and had to be moved back, they would place acquired items under him in the stretcher for return at a later date. It appears in this way Len acquired two decorated shotguns, a camera and a Nazi dagger. Eric, my cousin remembers the shotguns, I’ve still got the camera and Mum sold the dagger sometime in the 60s.

https://en.wikipedia.org/wiki/Western_Allied_invasion_of_Germany
https://warfarehistorynetwork.com/2018/12/20/the-1st-commando-brigades-invasion-of-germany/